Starting TURBOcad
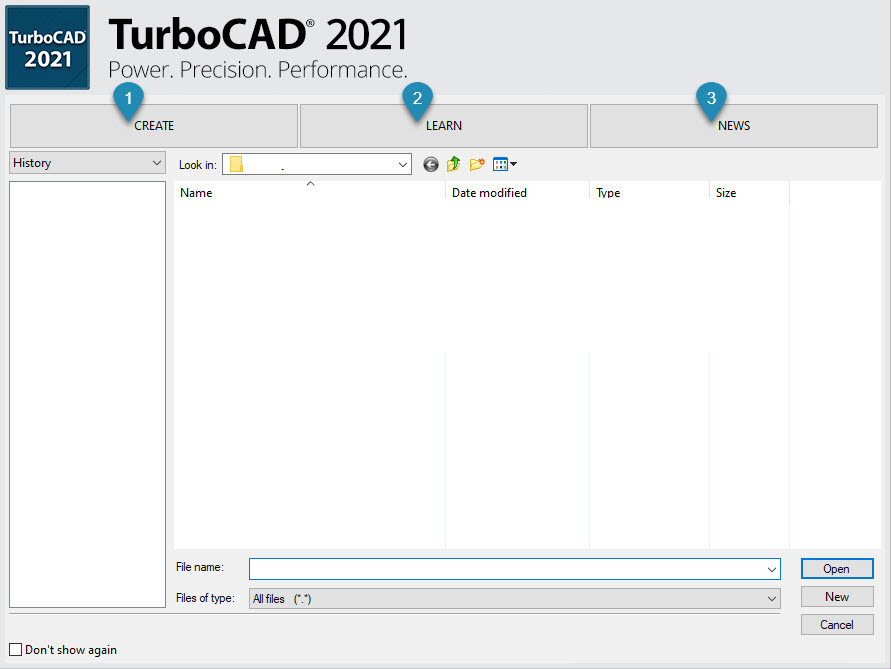
When initiating the TurboCAD program, the splash screen presents a dashboard with options such as the Create tab, shown by point 1 below, which allows a new drawing to be created.
A History of drawings is shown in the left panel and provides full history-tree access to all saved files.
The Learn tab allows users to view a range of videos in YouTube.
The User Interface
Ribbon : Workspace | UI Themes
Default : Tools | Workspace | UI Themes
The Graphical User Interface of TurboCAD is the interface by which the user is able to access menus, palettes and interactive commands. This is done by means of icons.
The TurboCAD User UI is adaptable to most operating systems and screen sizes, with Ribbon, Menu, Toolbar and Palette themes which can be set to user-selected preferences.
The user can resize all dialog boxes as required for their design environment.
The Editor
This is the area where the sketch is drawn and dimensioned at full scale, also referred to as the Model Space area.
The graphics editor is of infinite size, shrinking or expanding to accommodate all sketch objects.
It is not necessary to create a pre-defined drawing area; just start the sketch, and draw using full scale measurements.
Make sure the design is started in the model space graphics editor by left clicking onto the Model tab at the bottom left of the sketch area.
The background color of the graphics editor can be changed using Options | Background Color.
Cursor, cross hairs or a pointer can be used to draw and select objects. Use Options | Preferences to set the preferred option.
2D Objects which are drawn in the graphics editor are referred to as entities or sketch objects.

Typical layout of the editor using the ribbon menu and interface

Styles & Themes
Tools |Workspace | UI Themes
Styles and themes can be adjusted between TurboCAD Classic and a Custom Theme by selecting this option shown below. In this example, the interface style is set to Default.
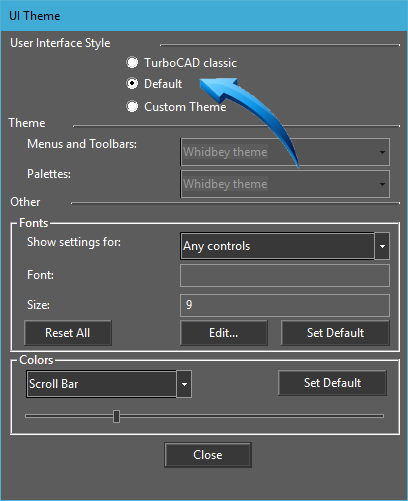
'Default' User Interface Style
Setting Styles and Themes
Go to Tools | Workspace | Customize and click onto the Styles and Themes option, shown above and select the preferred user-interface style. For previous users of TurboCAD, the TurboCAD Classic theme will return the user to a more familiar workspace environment.
All illustrations and video animations in this Training Guide are shown using the Default interface style, shown above.
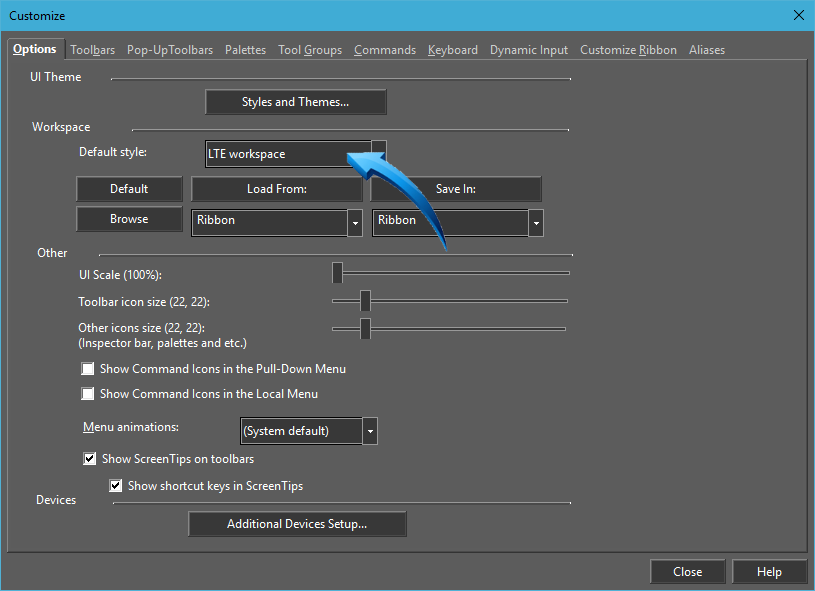
Several screen layout configurations are available from the Workspace area and specific layouts adapted to PC and Laptop screen sizes are provided, shown below.
To select a new layout configuration, select the preferred option from the drop down box shown below, and select Load From:
Selecting the LTE workspace
The Workspace Environment
Tools | Workspace| Customize
The default workspace environment, shown below is the typical TurboCAD workspace as characterized by the editor, Tools Palettes and Status Bar. Graphical information is input into the data fields using the TAB keyboard key.
The default workspace can be switched to the LTE workspace which provides a command line and dynamic input field interface.
Customizing the Graphical User Interface, default workspace is selected.
User Interface Style
Custom Themes
Tools | Workspace | UI Themes
This allows specific settings to be applied for menus, toolbar and palettes.
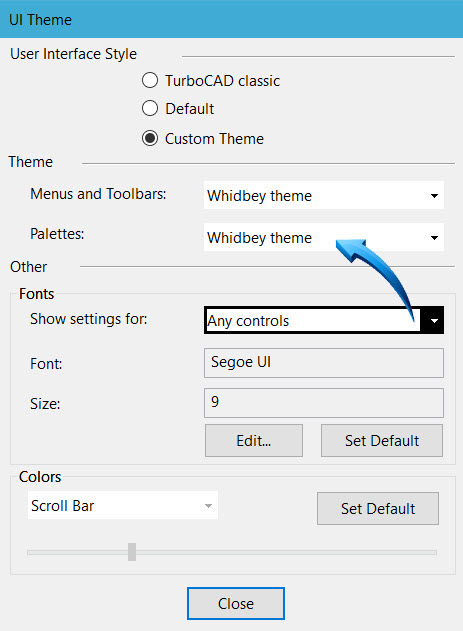
Setting a custom theme
Additionally, the PaletteOptions | Theme option can be selected from the Tools palette shown below. This allows specific styles to be applied to the palettes. In the example below, the Custom Theme for the Menus and Toolbars was set to Toolbox Whidbey. This theme provides an accordion-type effect in the pull-down menus, similar to the illustration below.
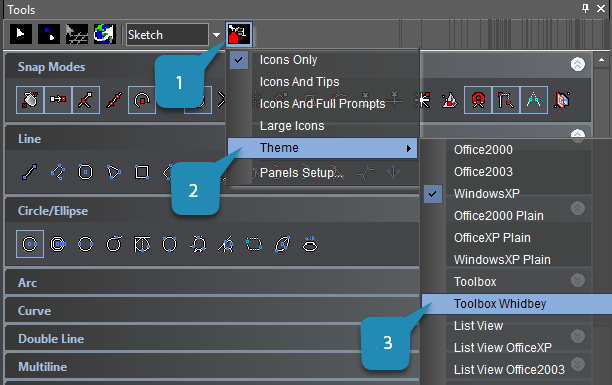
Whidbey Custom Theme
take Note
The Theme, for example, the Whidbey custom theme shown above can also be selected at startup, shown below.
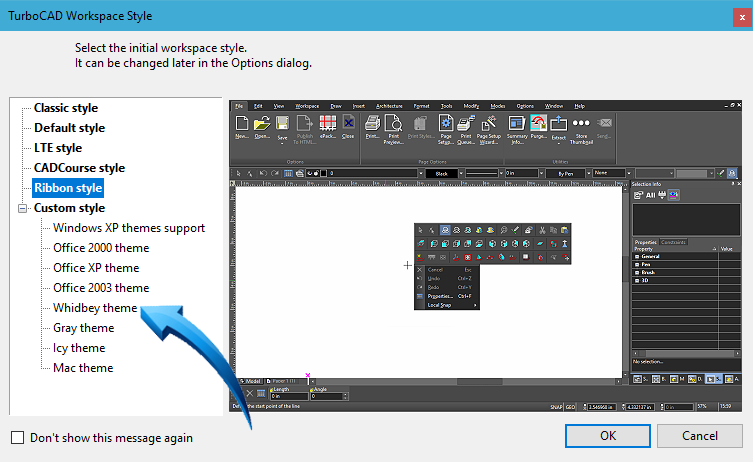
Selecting a custom theme at startup
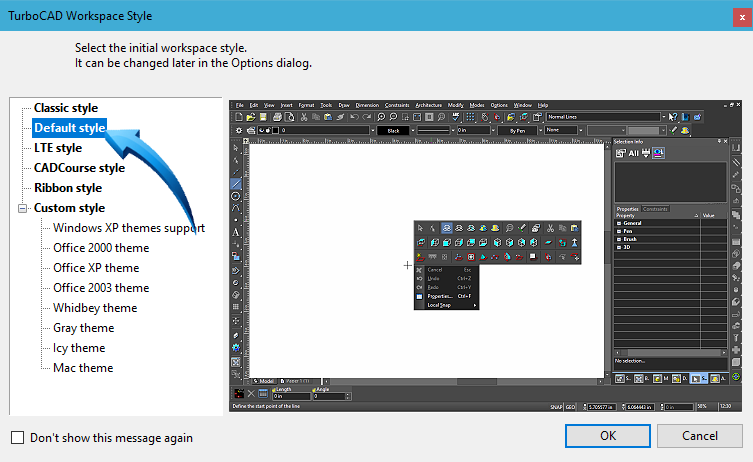
TurboCAD Workspace Style
Using the Ribbon Menu
A ribbon menu and corresponding workspace is introduced from TurboCAD 2018. This provides the user with a convenient and modern ribbon-style menu which allows greater use of the editor real estate.
This menu can be activated at start-up, shown below or can be activated from within the workspace using Tools | Customize | UI Theme.
When starting the TurboCAD program, the option shown below is displayed :
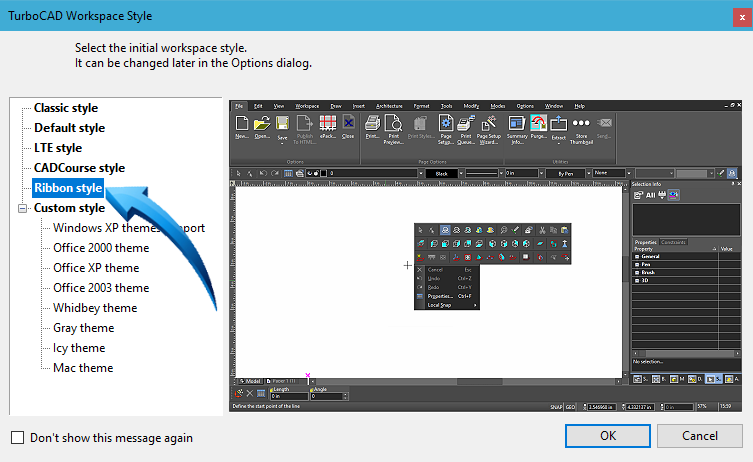
Selecting the Ribbon style menu at start-up
By selecting the Ribbon style option shown above, the traditional pull down menus are replaced with the ribbon menu shown below.
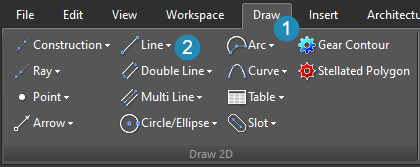
Selecting Draw | Line from the Draw 2D menu
When selecting the Default style shown below, the traditional TurboCAD workspace is loaded.
Default TurboCAD workspace
RIBBON LARGE/SMALL ICONS
A new local menu option is available which provides size options for the icon and text of the ribbon menu. Right click onto the menu area, shown as point 1 below, then right click again on the tool to adjust. In this example, the menu size options are set to Image and Text.

Reset Menu Buttons
Menu buttons within the Ribbon menu can be universally reset to their default size and setting selecting Workspace | Customize. Select Customize Ribbon, shown by point 1 below. To reset all icons to the default setting, select Reset Buttons Style, shown by point 2.

Switching between Default and Ribbon Styles
Switching between both workspaces is possible from within TurboCAD.
RIBBON TO DEFAULT WORKSPACE
When working in the Ribbon-style workspace, select Workspace | Customize, shown below.

Selecting Workspace | Customize to switch between menu and workspace themes
Select the Default style shown below. Select Close when the menu has loaded.
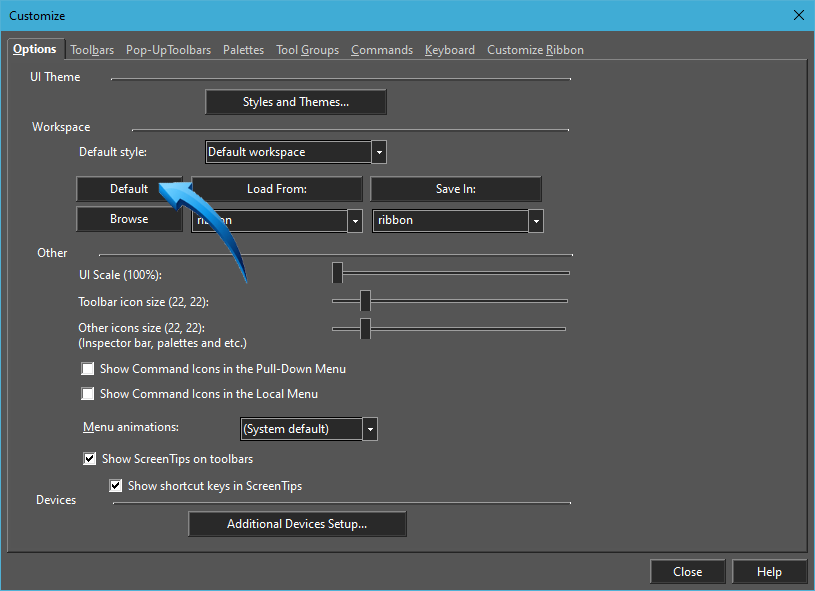
Loading the 'default' style from within the Ribbon interface
The Options menu will be displayed, allowing the customization of other features of the user interface, such as changing the icon and toolbar icon size, shown below.
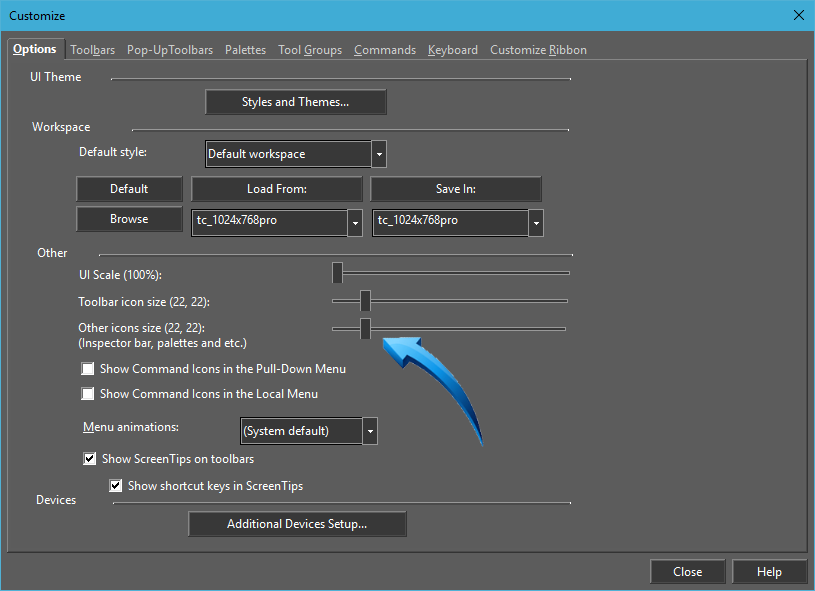
Adjusting the Icon size of the default workspace
DEFAULT TO RIBBON INTERFACE
Select Tools | Workspace | Customize
Select the Ribbon menu shown by point 1 below, then select LoadFrom, shown by point 2.

Loading the Ribbon menu from within the Default workspace
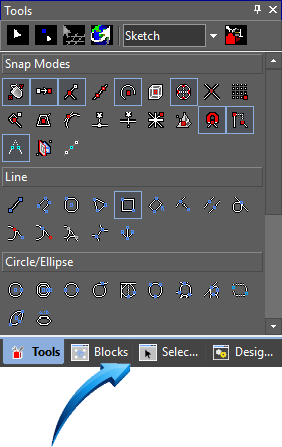
Activating Palettes from within the Ribbon Workspace
Palettes such as the Tools palette, the Blocks palette, the Design Director and the Selection Info palette can be accessed from the ribbon interface by selecting Tools | Palettes, shown below.

Selecting the Palettes from the Ribbon menu
The required palettes can then be selected and arranged at the edge of the editor, shown below.
Button Sizes
The overall size of the icons can be adjusted using the slider shown below. This will increase or decrease the size of the icon buttons to each user's preference.
This setting is a global system setting and remains at the defined size until restored or changed by the user.
In this Training Guide, the button size has been adjusted to 16 x 16. Slide the bar shown below to the extreme left.
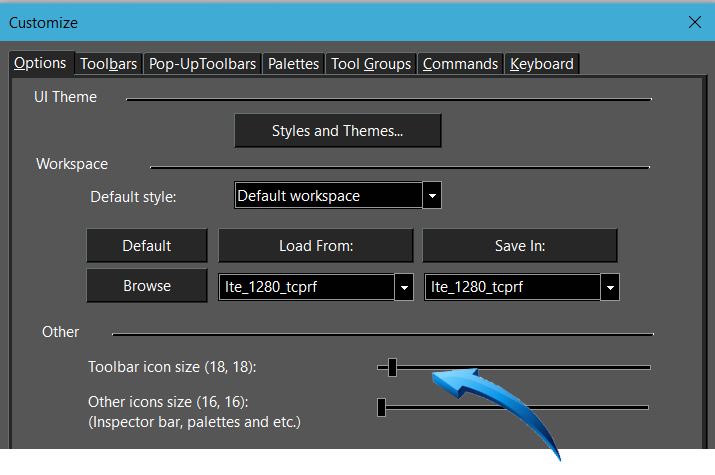
Resize TurboCAD buttons (icons)
Font Sizes
Tools | Workspace | UI Themes
This allows the font size and icon type and size of menu items to be adjusted. A new default setting can be set which remains in place until changed by the user.
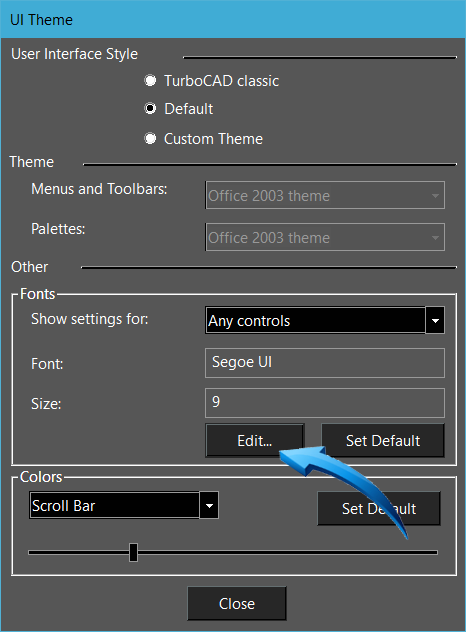
Setting the font type and size of the icons and commands
Navigating the Workspace
The Workspace is also referred to as the Model Space layout. It is the area where the drawing or model is produced at full scale using Draw, Modify and Dimensioning tools.
The Video Animation below provides a brief overview of navigating the Workspace using various Zoom, Pan and Slider tools, and demonstrates the use of the local and context menus.